
So as i was saying before i went in to Sunday preaching mode even though it is Saturday I'm doing it again someone really needs to tell me to shut the fuck up, I'm so full of shit some times my eyes should be brown.
OH yes right then front panel any way we that will be my boy, YES HE DOES SURFACE FROM HIS ROOM all be it occasionally set about with the old tools and cut her up. see pictures below.
 |
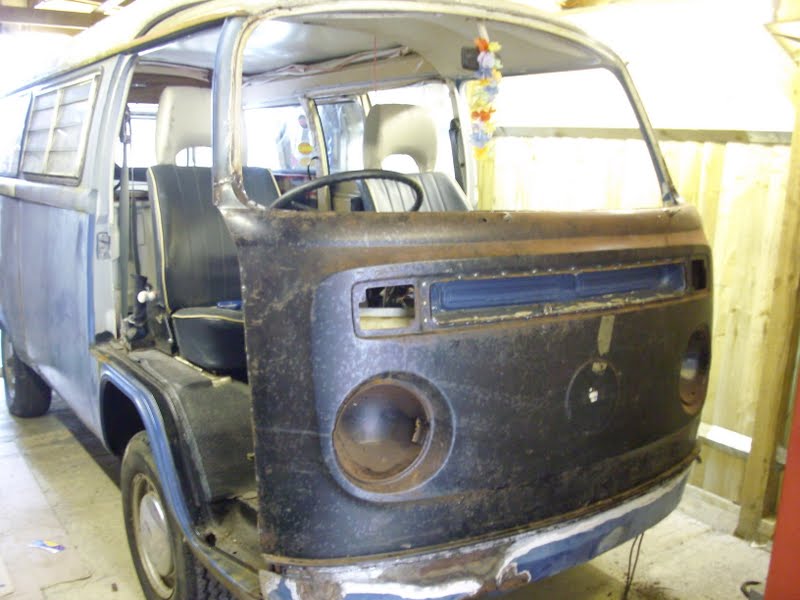
| The strip down commenced lights and external items first. |
 |
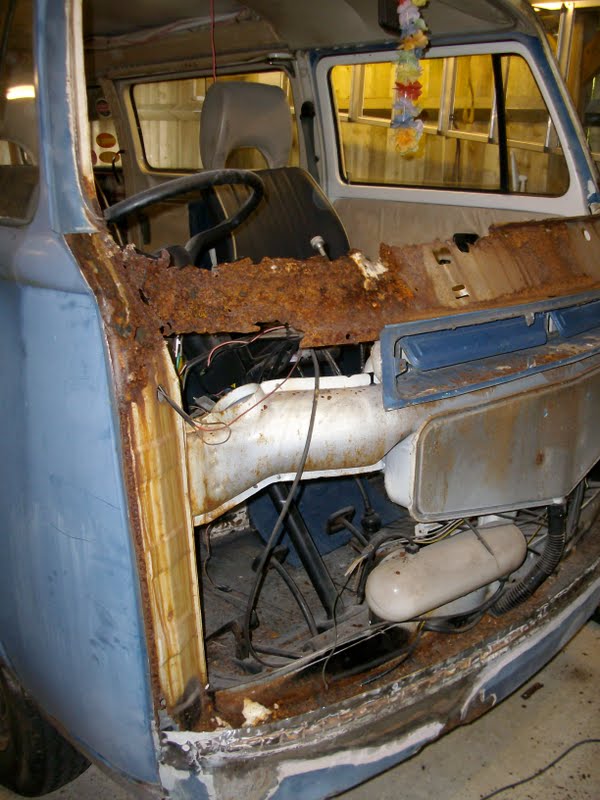
| Dash out next, I find it easier if you label some of the wires helps when you re-assemble. |
 |
| Dash gone now to remove the front panel and the inner front Panel. |
 |
| Once we started cutting the outer panel off we hit a slight problem this being previous repairs that had an excessive amount of filler used, believe it or not it was thick enough to stop the 1mm cutting disc from actually cutting. |
 |
| So as we had n issue i used an old wood chisel and had a bash at the filler. |
 |
| And this is what we found hhhmmm a tad thick if you ask me, possibly the previous owner that carried this out obviously had shares in plastic Padding !! |
 |
| Lots of filler going right across the van, unfortunately the budget don't include the front valance project for the future as the steel under the filler was good. |
 |
| The rust is the result of a crack forming in the filler along the joint's once it gets in there this is what happens it eats away at ya tin from the inside, undetected this will rot your pride and joy unnoticed, if you need to use some keep it thin. |
 |
| The front could be cut off once the filler was out the way, as you can see the rot was again doing its bit from the inside, undetected until it was well and truly taking hold. |
 |
| That huge square blob is actually expanding foam that a previous owner had used to fill over trouble with this is once the damp gets back in so does the rust. |
 |
| Rot that was present behind the inner front panel this needs to be cleaned and repaired. |
 |
| there was a few minor areas that had a small amount of rot in these again were cleaned and repaired. |
 |
| Both sides were the same again this was plated up and made good, prior to the front panel being replaced. |
 |
| Another repair. |
 |
| Front inner panel installed, just need to get the outer panel in place and welded. |
 |
| Front clip in place ready to be welded up. |
 |
| That's the first time I've seen my helmet from this angle, My wife had commented on the size of my helmet on occasion, i realize what she meant now !!! |
 |
| Job almost done there is still a bit to undertake in order to complete along the bottom, I'm honest if nothing else.
So far it has taken around 17hrs work to get this far, we are planning to get two complete front wheel arches, one jacking point repaired a sill and battery tray & quarter done still got a bit to do yet, so until next time keep the dub thing alive. Oh yes the Golf below is called Nitro Nancy and belongs to My Daughter i promised i would put this on my blog so there you go Ellie.
|

Nice to see work progressing, not so much with the van more with getting Tim out of his room!!!!! work on the bus is looking good as normal, keep up the good work.
ReplyDelete