Total Pageviews

Monday, 3 June 2013

Turbo Charged Early bay, Part 3 and Counting.

Well the long hall of the home grown turbo charged bay continues, in my last post I had started to fabricate the pipe work to go from the turbo to the carb's, yep im going for the blow through option, may choose to change this at a later date but for now this was I believe the easier option & cheaper, that's me all over as im regularly called a cheap skate!
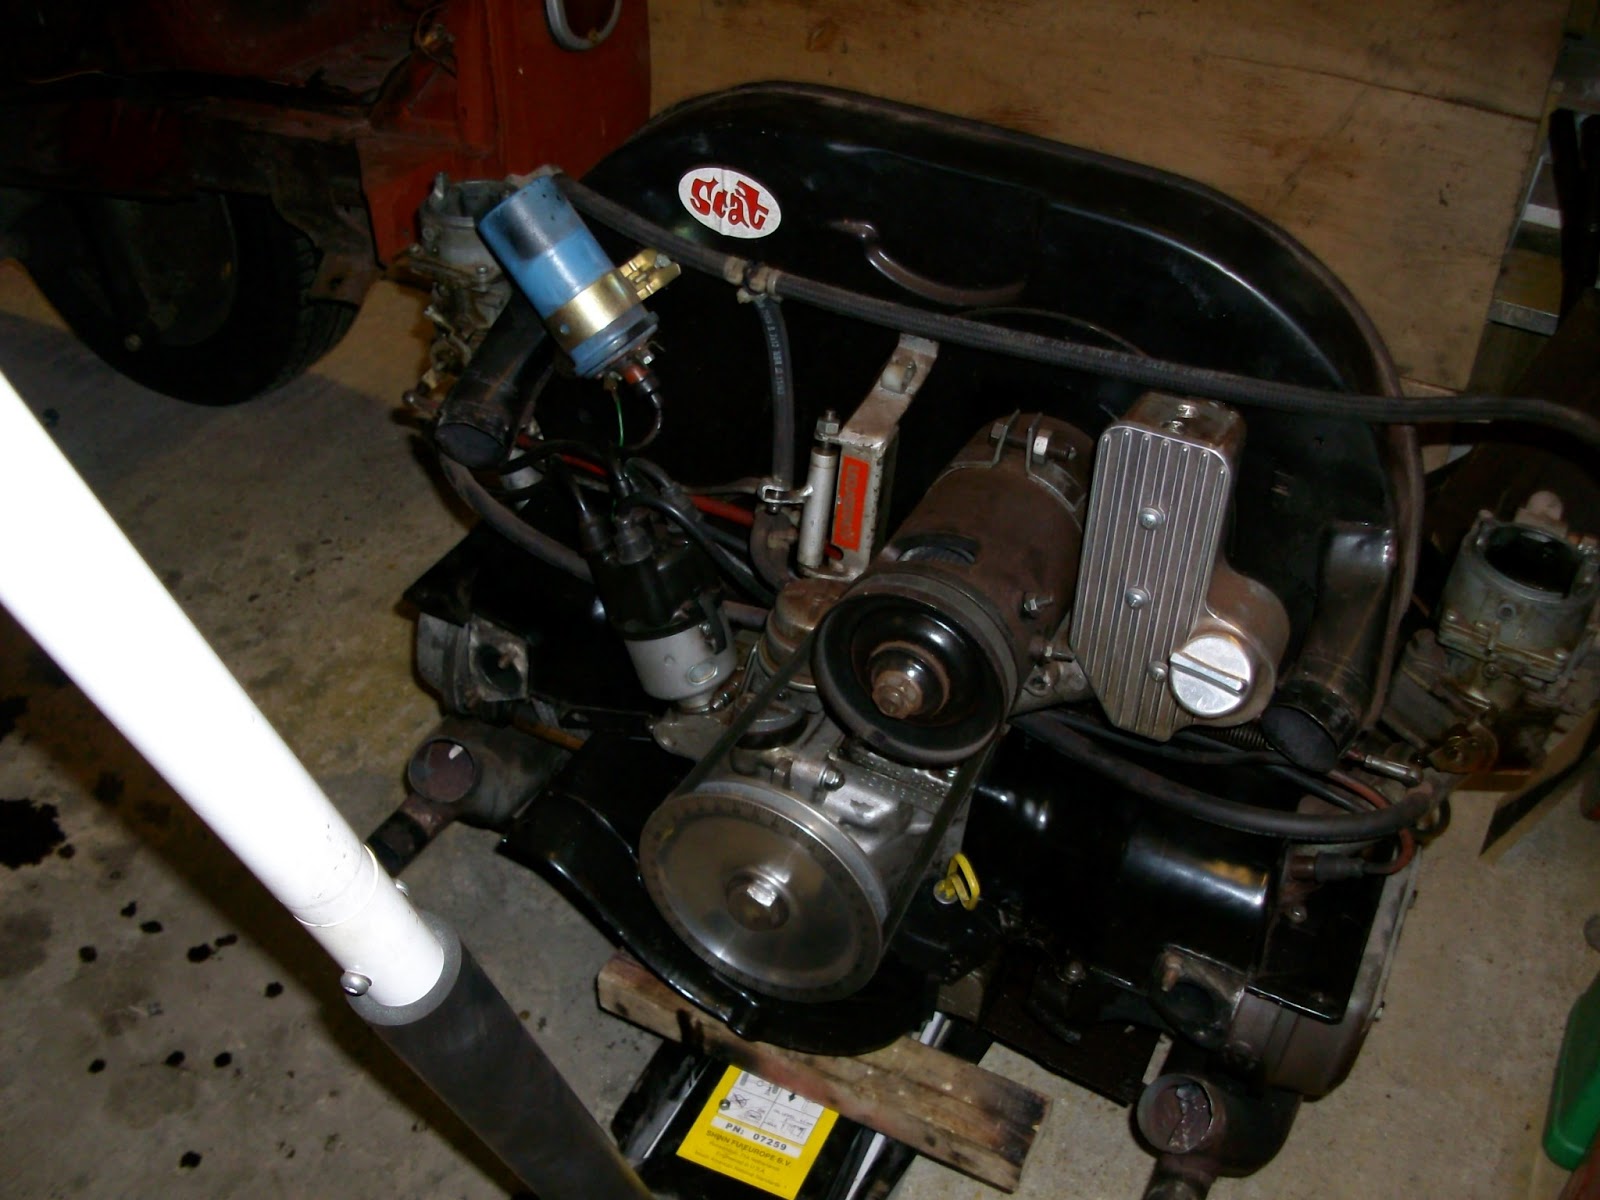
I have now actually pulled the motor from the van in order to find that bloody oil leak that you all complain about?
So I've pulled the motor, identified where the oil was leaking from, collected Claude's home grown engine trolley modified it to take a Bay motor and finished the pipe work.
I have also started to, but not yet finished the remote oil cooler, I've had it for years never got round to doing it.
Pictures below as usual to show my efforts.

This Entry was sponsored by Sainsbury's, Keep reading you will see Why LOL.


Tin ware now completed and fixes back together nicely allowing easy
removal of the rear valance with out removing the whole set up.


The section with exhaust exit pipe going through will remain in place
when the rear apron/valance, call it what you will is removed.


Oil cooler brackets made up.


Oil cooler in place and bolted down, just need to get the mandrel
 cutters out and make the holes for the pipes to come through.


oil cooler brackets bolted in.


Engine out that's been in a long time now since it was fully re-built
some one asked before what size barrels etc. this had being a 1679cc they are 88mm.


Top taken off to find that pesky leak, Generator tower, should have known.


Claude's engine stand, If Sainsbury's made engine trolleys they would probably look like this
 top end mocked up so I could finish the pipe work, note the sectioned curves on the carbs these
 I have made to suit my needs bloody pain staking process
but required to fit in as I want.


A close up to show this was made up of six sections of pipe all cut by hand,
I must be bloody Mad.


And the other side . there not identical either.
One side welded up and added to the first pipe I done that would be the
easier one, and if you look just to you right you will see that one and you
will also work out im a bad liar.
Trial fit before I go any further try once check and check again if I have said that before sorry
 but I have got it wrong so many times before and I have learnt the hard & costly way.


The other side welded up and another trial fit, each weld is done in several
sections to keep the heat down as I have found even after many such projects
that even pipe of this size can distort through heat, In all each of these curves has
actually taken several hours work.

The induction pipe now in its completed State, ready to be refitted for
 hopefully the final time, we shall see.

There we go another mile stone in my on going efforts to further
my on going passion, with Vw's and my Dream of going it alone and
running my own little workshop.

The next step for me is to install the oil feed line & the Oil drain off, complete the cooler pipes, put the heat Rapp on the exhaust, install the pressure pipe and boost gauge, re-assemble the top end then test the motor on Claude's Trolley, that's going to be scary!
All in all im getting there bit by bit, the actual day this gets run up for the first time im going to video it and put it on here so keep watching its going to be interesting?
 
 
And as a last statement and in the words of Americas most famous leader,
 
THATS ALL FOLK'S & DONT FORGET TOO TUNE IN NEXT TIME.


Sunday, 28 April 2013

VW Type 2 Turbo project Part 2.

In my last post i had achieved Fuck All! Not really LOL,  hang on there just a tick as i need to check the last post to see were i had actually got to, Is that the right were or should it be where? Oh well who actually gives a shit, OK I'm back now i know where i got to in the last post i can carry on with my usual dribble about my on going garage antics, So last pic was of the turbo mocked up on the home grown manifold, since then i have managed to undertake some more on my Bus, The manifold has been completed and checked for fit Bla bla Bla,The waste gate is a 38mm external Tial type the waste gate exhaust has been fabricated and i have cut the hole for this in the rear metal work, I have also cut the rear metal work and added some fixing points so it is now in two pieces and fixes together in situ, i have fabricated the exhaust this is made of several pieces cut and welded together as i could not find a bend tight enough to suite what i required, this I'm sure will be a topic for debate due to the nature of it having no silencer, Mind you my previous exhaust was to say quite loud, so am i bothered? in simple terms NO!.
I am now fabricating the compressor tubes for the induction side of affairs these are going to feed direct into the carbs.

Any way enough of my Dribble pictures below for prosperity i hope people like what they see, Please feel free to comment if you have a google account set up

Exhaust Flange got it off EBay £12.00 Result.

The angle of the bend i required to fit in the space i had was difficult to find even mandrel bent, so i had to create a one off.

Welded up, five individually cut pieces.

Down pipe added.

Flange added ready for that refit.

Well it fits, I'm happy with that!

You can see why it needed that tight bend.

Waste gate exhaust made up, Nice and simple.

Waste gate exhaust fitted.

Tail Pipe fitted.

Tin Ware cut ready for modification to suit my needs.

Tin Joint by the engine seal.

Joint to the rear Apron/Valance your choice of name as I've heard it called both.

Installed in the bus checking for fit.

When you look from under neath the pipe work does look complicated!

All in place for yet another of the countless mock ups.

The creation of the first of the compressor pipes for the induction side, the problem is you have to make it all from scratch the fun of home grown is the achievement's?

Induction pipe second section this was a bit easier just one whole to cut.

Clamped for welding, the good thing about having a good well built and level bench you can clamp to it.

Another weld done not too many more maybe ten or so, i have another two bends to create.

And yet, another mock up, you cant have to many trial fits, looks four times check four times, measure and re-measure, them measure again when you are happy and 110% you got it right tack it, re-fit it and check again, if you need to do another mock up make sure its all as you expect then complete that piece.

 
If i can give any good advice it would be Research first even if it takes months before you are sure you are doing it right, during your project take you time don't rush it will go wrong, don't cut corners if it starts to stress you leave it and go back another day, be patient and always give 100% to your work.
 
Oh yeah one other thing if you have taken the time to research your project, and you get people trying to put you down, stay mature keep level headed and politely and in the best possible taste tell them to FUCK OFF!
 
Keep smiling even if its hard it may just cheer someone else up.
 
 
Thanks for visiting.

Thursday, 11 April 2013

Early Bay Type 2 Turbo

I had been talking about putting a turbo on my Bay, it already running a 1679cc motor with a mild cal and twin carbs, She got some go but when is there enough, that age old question when do you stop?

Like i said been talking or threatening to do it for some time, heard all the oh you have to do this you have to do that,after a lot and i do mean a lot of talking with people and trawling the net looking at pictures & Videos etc, over a period of time a accumulated the basic parts, Turbo handy when your looking at this kind of project a bit of a stumbling block if its missing, got a new one a nice 38mm waste gate, New blow off vale/Dump Valve call it what you will, pre-cut flanges etc you get the picture, i decided to utilise the original four branch and cut this up to make the new one, i decide to put the turbo inside the engine bay and at the same time try to keep the engine easy to get too as well, i brought the manifold up through the rear apron on the left side of the engine bay and the turbo is to sit on top, The pictures below will show what i mean, any way i have so far got to the point of getting the turbo mocked up on the manifold in the engine bay.

Still got a lot to do before i can contemplate the initial fire up but it will get there, i have also got to prove to my doubters this is achievable.

The pictures as usual below show where I'm at currently. A couple of the pictures are not brilliant as i took the on my phone, its a blackberry this word is obviously foreign or Latin for Shit !

First two Pipes Made up.

I curved the pipe to allow the heater pipes to be connected properly.

This shows another view of the curves allowing connection of heater pipes.

lower manifold pipes driver side.

Connecting the pipes up ready for the collector.

Re-used the collector from the original four branch.


This shows the collector through the rear apron.

Looks quite good mind you I'm biased.


Flange for the turbo to sit on, the tube is 2.25 Inch knocked  into a square to fit inside the flange.

Hole cut in the side for the waste gate.

Waste Gate Tube cut to fit on collector.

Collector and waste gate assembly mocked up, note i still have to cut the hole for the waste gate pipe.

Turbo mocked up.