Total Pageviews

Sunday, 24 June 2012

Karmann Ghia Update.

Well i have been working hard on the Ghia, as per my previous entry on the ghia, if you have stumbled across this then you will find it in the entry list on this blog, Stating the obvious there really but HA HO, i have since the last time repaired the inner wing, I have put on the complete front section on the inner wing and put some new plate in the top of the inner wing removing the rotten stuff, I have on several occasions done a trial fit of the nose cone and wing, the wing and the nose come from two separate cars as the cuts do not meet up, you can see this in the Photo's that will follow. The panel named as the upright panel in the spare wheel well was also rotten, unfortunately these seem to be like rocking horse poo, and several weeks wait if you want one, So after discussion with the owner it was agreed i would just make one. The nose is now welded back in place with the new nose rubbers inserted, The wing is now in a position to be welded in place there after leaving me with the passengers wing to repair, Then it should be back of too its owner.

I have taken around another Thirty Nine Photo's of the work on this car, it has i have to admit tried my patience, I may take the opportunity to advise anyone that these are not the easiest VW'S to work on to this level, The works may not look that great but so far there is a number of hours work in this project getting into multiples of ten.

If you take the time to have a look, leave a small comment if ya can nice to know who's looked.


Upper inner wing Section with rotten area still in place.


Inner wing front section removed.


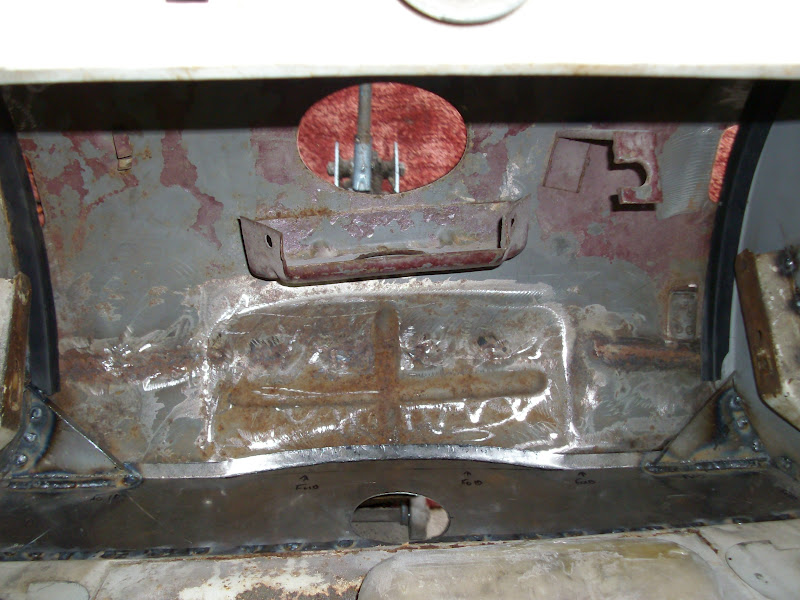
As you can see in this one the rotten area at the bottom, in the centre area & round the fresh air vent cut out, and the spare wheel rest and bumper Bracket removed.


New inner wing repair panel ready to mock up.


Nose cone clamped in place to ensure correct positioning of the inner wing.


Wing tried for fit after the inner wing was welded in place.


As i said in the write up at the beginning the wing and nose are from different Ghia's the original cuts show that quite clearly.


At least the cuts i have done are OK and fit well.


Inner wing top section welded in place.


Just for the record the spots on the inside are what held it in place, this side is welded all the way round.


Rotten Upright Panel.


New One measured and ready to cut out.


Nearly ready to trial fit.


All folded and the flangged edges Beet into shape.


Just the hole for the access panel to go in.


Done.


Trial Fit, perfect.


These fit in the corners of the upright Panel.


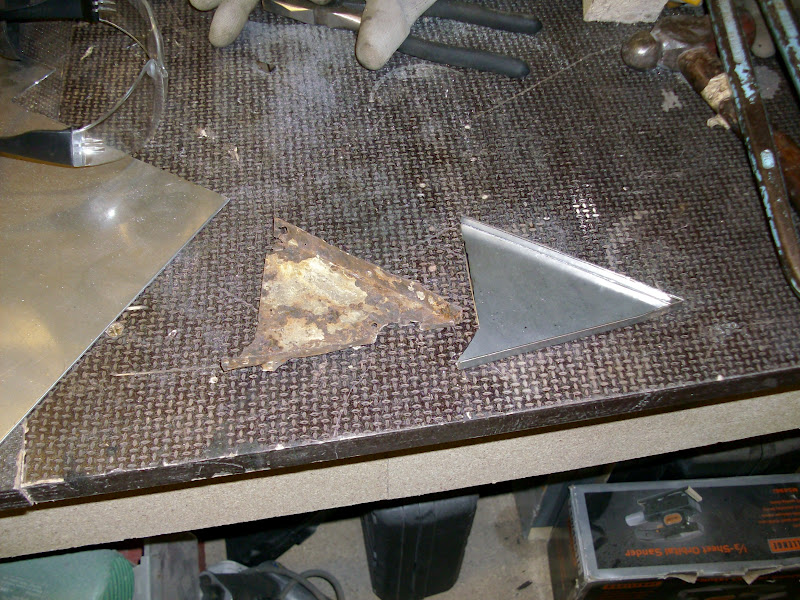
First new one made up.


Second one made up and trial fitted.


And the other one, Both Fit Fine.


Now welded in place.


And the other side.


Nose cone Mocked up again.


New rubbers in place.


Just got to weld it in place.


The home made panel fits very well.


Nose cone welded up.


Had to make a few minor repairs to some tin and brackets while it was here.


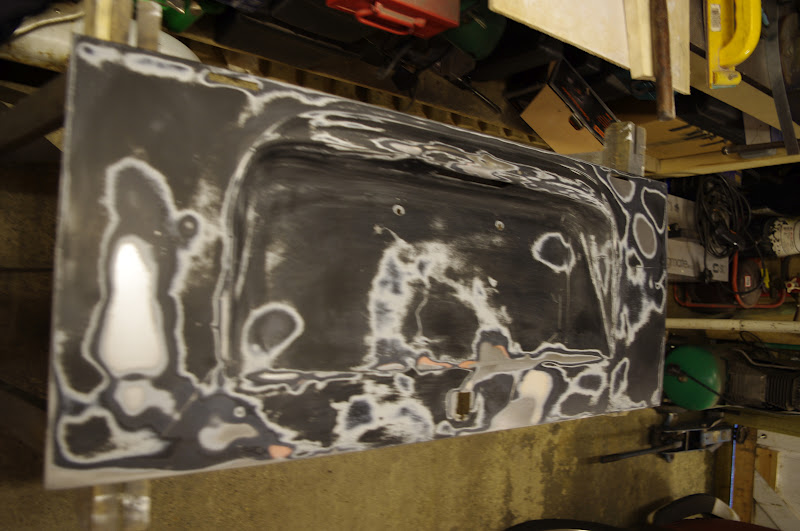
Bit of cleaning up prior to another wing fitting session.


Between this photo and the one above was a period of hours, and a number of on off sessions with the wing ensuring as Good fit as possible was made, Compared to earlier it now seems quite good.

Hope you find it worth looking at, Thanks for taking the time to look.

Saturday, 9 June 2012

Aylesbury Low Lifes Run to the House of Dub.

I was scratching around like you do when the weather is in such a glorious period of shitness when i stumbled across my Video recorder so i grabbed it and blew of the dust, It then dawned on me!

The last time this saw day light was way back in last summer i had attached it to my old stand that stuck to my GSXR Tank and stuck it on the beetles wing,  we as in my self Dave Clarke, Claude Buisan & Tim Munro took a trip over to see some good friends over at the House Of Dub Meet at ledburn.

This video is the heavily reduced footage of this experiment, I do have to point out this is the first attempt at creating a video so its not great, So if by some chance Steven Spielberg Stumbles across it!

     Don't Worry Steve you have nout to worry about Trust Me!!

Sunday, 3 June 2012

karmann Ghia.

Well the Ghia finally arrived at my humble little Workshop, I must say when this little gem turned up though just for once a nice straight forward little job i can get stuck into turn around and get back to the owner, when i first went to see this Ghia it looked nice apart from the fact someone had grafted beetle head lights in the front, Darren the owner had grown to hate them & i have to admit i can understand why, Beetle lights should stay in beetle not Ghia's. it was with me for a drivers wing and a new front panel, passengers side the owner wants rebuilt with a replacement head light surround panel.

Well back to the it arrived point, we stuck in the work shop and there it sat till Saturday when i decided to have a little scratch around and see what i was to deal with, And to my absolute delight, And if you believe that your  bloody stupid things were not as they seem as usual the old rot was there and i found it and not where i want it to be, take a look below progress has been made.

I actually took photos from the start this time so i have put a few on to show progress.

Don't look to bad does it drivers side is poor other wise its not to bad.


That doesn't look to bad.

Better cover the glass to avoid grindings pitting the surface's

Like wise for the rear.
 
But when one side is this bad you have to start looking, How bad is the other.
Like i said just gotta look, although far worse than i had estimated.

And then it gets worse still, this old girls front end is not very good.

This is glass & filler about an inch thick.

Plates spotted in place to bond too, This is really Bad workmanship.

Uncovering more this time in the side of the wing.

Drivers side wing now removed.

There are so many plates on the front of this wing.

Then i found this adjacent to the bonnet hinges.


This is up on the bulk head next to the fresh air inlet pipe.

Front of the inner wing

Rear of the inner wing near the top adjacent to the Bonnet hinge.

This screw was holding the front panel in place prior to filling over.

Front clip removed

And the hole in the side of the wing.


Monday, 7 May 2012

The buses arse end, The last mile.

Well i finally after a little effort achieved the continued threats of i will finish the bus, well i have! HA, Thank god for bank holiday week ends. last time i done an entry on the rear end, she screamed oh god that hurts, No sorry only joking scratch that and ignore its just my sick sense of humour.

Right back to the actual task i should be talking about the half repaired corner of the bus. the corner had been welded in and it was the finishing left to do, so i pulled out the filler and spread a thin coat on the van then flattened it off to a smooth finish followed by a coat of filler primer to get rid of those in perfections in the filler, you know the odd line still visible from the course sand paper, This was then followed by the obligatory red oxide the vans standard colour, while the Red oxide was drying i coated up the Overider with some red oxide to protect it prior to the white primer & coated up the engine hatch and rear apron, I left the painted areas to dry adequately overnight, Then removed the masking and paper prior to being reassembled today, That will be May 7th 2012.

took a few pictures as usual not sure if i ever do enough pictures really but no complaints to date so i assume all is good.

Hatch prepped and ready for priming.

Rear corner, Nothing like stating the obvious is there, In filler primer this was prior to flatting off, i should have taken a picture when it has been flattened off it was oober shiny the whole panel looked the bollocks, HHMM gives me a idea for a later date.

From another angle, looks pretty good if you ask me, mind you if i said i wasn't i would be a twat?

Panels primed, but not flattened off, cos I've got this idea you see.

Overider primed, when you look at this Don't forget this was mullered in the shunt and i beat this straight.

If i said it was perfect i would, I get the feeling of Dajavous (fuck knows if that spelt right even spell check said what the fuck is that) here, Oh perfect i would be a liar but if it was it really wouldn't match the rest of the van would it. That assuming that you have seen it.

The newly coated area from another angle.

Now we really are on the home run when you get shiny bumper parts.

These were rusty as F**k so i gave them a good rub down and a splash of silver, One was badly twisted from the prang by the time i had beaten it straight it didn't have much chrome left.

Just the catch, Lights & bumper left to do.

Apart from the obvious fresh paint you wouldn't know it had been Hit at all.

Not bad really, Perhaps i should take it up for a living !

Now that's more like it, Got my Baby back just the way i like it.

All done back up to scratch see you at the next meet if ya see my van feel free to stop and chat.


Right then i need to think about this idea, catch you soon PEEP'S.


Oh yeah take a look at these pictures, All being good and well this is the next visitor to the Work shop, Ya just know if it does it will be on here.