Total Pageviews

Tuesday, 10 July 2012

Karmann Ghia, And theres more.

Well in between working on my bay, undertaking various other chores & not getting damp, wet and Muddy along with a large commodity of others, i have found time to make some serious head way on the Karmann in my workshop. last time i done an entry on my blogg regarding this little beauty, the wing was pretty much ready to weld up, thus leaving just the door to put back on and then tackle the head light on the passengers side, HHHMMM this is one area that may prove to be tricky, as these front ends are assembled from a number of sections and welded together, my concerns were that by cutting around to much at once may have an effect of causing some distortion in the panel.

This being the case i opted for removing the rot and replacing with new metal in sections, with the assumption this would alleviate the issue, my assumptions were in this instants correct, as the pictures that will obviously follow will show.

The car is now in a position that the front now looks like a Ghia, the whole of the front is in place and welded up and some finishing works done to the welds, the are around the fresh air vent to the drivers side had quite a large area of thin metal and the cuts to the new panels very poor, so i had to put in a new section of plate ti finish the front. then i turned my attention to the passengers wing head light area as mentioned above.

Pictures below of the works not too many.


The section that was missing now replaced.


I stitched the panels together where they met and then stitch welded the panels together where they did not till they gap had started to stretch my abilities with the welder, this mainly due to the extremely this sheet i was working with in places and the size of gap needing to be filled, big gaps meen lots of weld, this equals copiace amounts of heat, thus causing unwanted distortion in panels.


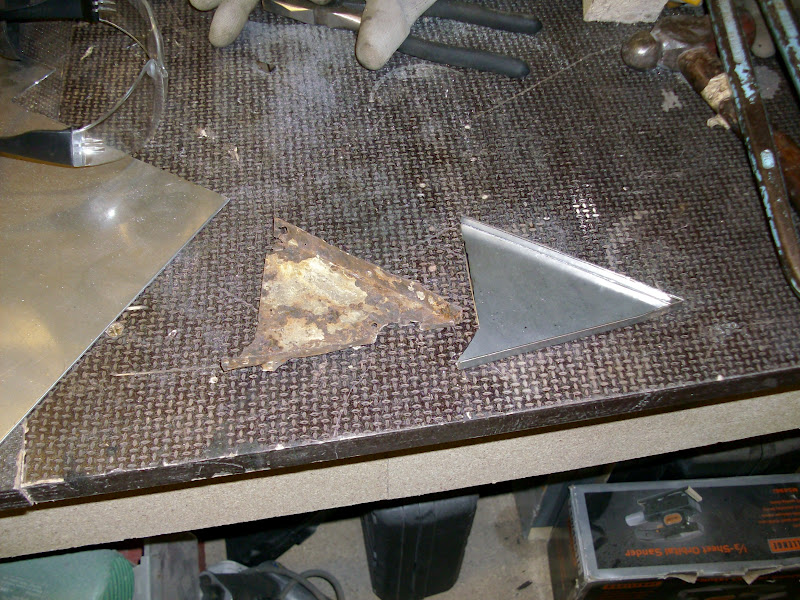
This is the section i mentioned, cut the thin sheet out and put some new steel in.


This is the section i made up.to go in the front.


Plate in place, trial fit prior to welding in place.


Now welded up and gone over with a polishing disc to clean it up, at this point take a look at the head light area, this wing has been or should i say i think this has come of an American Ghia due to the insertion of a head light ring, as usual with USA VW'S the lights are different, Just a hunch.


In this one you can see the ring has been removed and now has been suitably altered to take a European light bowl.


Right then i cut away the crap and stitch in the new, Darren the owner has already purchased the light repair panels, although the drivers side was nor required but came in handy for measurements to rebuild the passengers.


Now it is starting to resemble a proper ghia.


Next section i cut out was the area to the side.


Right then this panel curves in a number of different directions, and as it took a lot of time to get right i forgot to take pictures until this point, i get involved and forget, remember when welding panels and sheet move around short welds in different areas helps disperse the heat and stop distortion allow period of cooling between welds.


next piece removed.


Next piece put back, you get the picture.


And i have managed to keep the thing in shape.


Next step is to put the last couple of plates in and clean it all up, should look pukka me thinks.


Just one final note, i do this for a number of reasons, it proves that with a little knowledge, a little time and effort, you can achieve a lot, this to me is what true enthusiasts do.


Once again thanks for looking.

Monday, 9 July 2012

Buses Annual health Check Partie Deux

 Well i finally got the bus MOT'D on the Friday before Camper jam, trouble is the bloody thing had consumed my funds for the trip, so i was not wallowing in mud like a pig, i would like to stress at this point how disappointed i am to have missed it, But that would be an absolute bloody lie because i didn't. any way on with the post. below are a few pictures of the final leg of the Bus being prepped for the annual check.


Outer front Valance welded in Place, Not an easy task as it kept pissing down ans as my entrance to the garage is on a slope it all headed my way, Hence the card board to soak up the water.


while i was replacing the Inner valance there was a couple bits i was not happy with so i done these while i was at it, as usual i like to have a mock fit.


Plates in place prior to welding.


Job Done now to fro the bumper back on and head to the garage for the ministry to rob me of my hard earned shekels.


Quick blow over with some Red Stuff !
On the ramps, John and his Bitch, doing there thing !!

John checking the lighting, obviously all Good, Not sure why the picture rotated it's self Oh well!
John checking the thing is capable of stopping.


Ready to come off the ramps.


And all done and healthy for another year, Yeah Baby buzzed round in her all week end.


Wednesday, 4 July 2012

Buses 2012 annual health Check.

well its that time again, the bus needs it's MOT trouble is I've been a little consumed with the Ghia, Theres a couple of days till Camper jam 2012 and i have no MOT, i was aware of a little hole on the inner valance last time but as usual & before you all feel suitably liberated enought to say such things as what a dick, we have all done it, thought i will get that sorted, Ive done that over & over again, and here i am, so its run out today and its booked in for 11.20 tomorrow i checked it over for the usual items all OK, then i had that thought, FUCK! Shit the inner valance Bugger, Hole! damn blast how bad is it now, so i shoved my hand under the front and groped around, and it started to crumble, despair set in, self inficted name calling, The bucket is now broke, right nothing for it shoved it in the gates front end in the work shop fetched out the tools and got stuck in.

Sadly to say my prospects for camper jam are now looking decidedly poor  at the moment as i am not sure the job will be completed in sufficient time to get the MOT and get the old girl there.

GUTTED !

Pictures below as usual, feel free to comment.


On face value a little rust colouring on the bottom not that bad ?


Just a few little holes surely it cant be all that bad, Can it HHMM.


Ah that looks a little worse than the other side best have a better look.


outer valance removed not very pretty in there I'm afraid best keep digging, Anyone got a spade ?


Its grim to say the least not what you want when you got the test the next day.


That saying it don't look so bad when you step back & look at it, Who the fuck came up with that it looks like shit, Fucking Twat.


Outer skin of the inner valance removed, at this point it made me smile, Got no idea why as it still looked no better what so ever, stepped back looked again, well he's still a fucking Twat.
That's a lovely Rug though !!


I know lets look from a different perspective, You guessed it still a twat!


If in Doubt cut it out, well that what i say.


Just playin for time with this one, i was proably either drinking Coffee, Or possibly weeping like a child, three sharp in takes of breath followed by a good sniff !


All cleaned up and ready to start the welding, it was as this point Mummy called me in for supper as it was way past bed time LOL.


But before that we have to have a trail fit, stand back take a look, I'm starting to see the logic in this stand back and look stuff, that better than it looked earlier.


Just the welding to do and she should be ready to rumble and that she does well ;-)

Sunday, 24 June 2012

Karmann Ghia Update.

Well i have been working hard on the Ghia, as per my previous entry on the ghia, if you have stumbled across this then you will find it in the entry list on this blog, Stating the obvious there really but HA HO, i have since the last time repaired the inner wing, I have put on the complete front section on the inner wing and put some new plate in the top of the inner wing removing the rotten stuff, I have on several occasions done a trial fit of the nose cone and wing, the wing and the nose come from two separate cars as the cuts do not meet up, you can see this in the Photo's that will follow. The panel named as the upright panel in the spare wheel well was also rotten, unfortunately these seem to be like rocking horse poo, and several weeks wait if you want one, So after discussion with the owner it was agreed i would just make one. The nose is now welded back in place with the new nose rubbers inserted, The wing is now in a position to be welded in place there after leaving me with the passengers wing to repair, Then it should be back of too its owner.

I have taken around another Thirty Nine Photo's of the work on this car, it has i have to admit tried my patience, I may take the opportunity to advise anyone that these are not the easiest VW'S to work on to this level, The works may not look that great but so far there is a number of hours work in this project getting into multiples of ten.

If you take the time to have a look, leave a small comment if ya can nice to know who's looked.


Upper inner wing Section with rotten area still in place.


Inner wing front section removed.


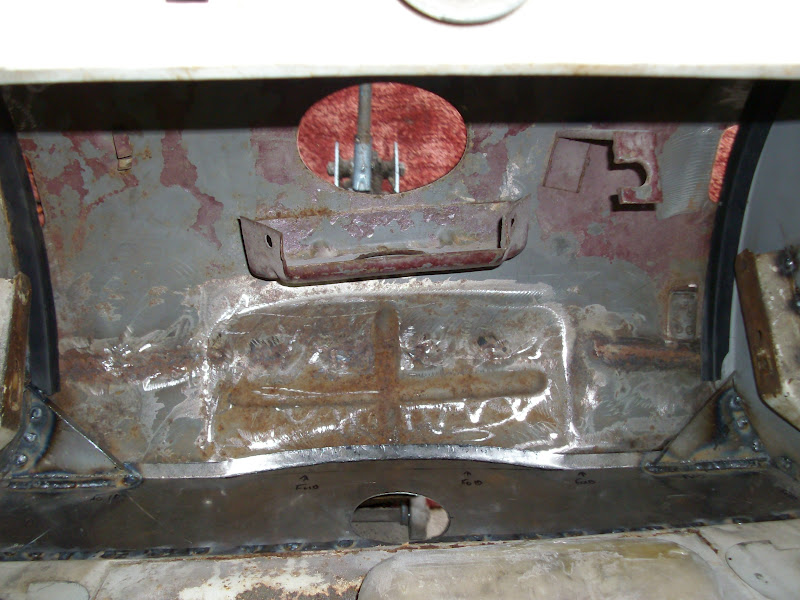
As you can see in this one the rotten area at the bottom, in the centre area & round the fresh air vent cut out, and the spare wheel rest and bumper Bracket removed.


New inner wing repair panel ready to mock up.


Nose cone clamped in place to ensure correct positioning of the inner wing.


Wing tried for fit after the inner wing was welded in place.


As i said in the write up at the beginning the wing and nose are from different Ghia's the original cuts show that quite clearly.


At least the cuts i have done are OK and fit well.


Inner wing top section welded in place.


Just for the record the spots on the inside are what held it in place, this side is welded all the way round.


Rotten Upright Panel.


New One measured and ready to cut out.


Nearly ready to trial fit.


All folded and the flangged edges Beet into shape.


Just the hole for the access panel to go in.


Done.


Trial Fit, perfect.


These fit in the corners of the upright Panel.


First new one made up.


Second one made up and trial fitted.


And the other one, Both Fit Fine.


Now welded in place.


And the other side.


Nose cone Mocked up again.


New rubbers in place.


Just got to weld it in place.


The home made panel fits very well.


Nose cone welded up.


Had to make a few minor repairs to some tin and brackets while it was here.


Bit of cleaning up prior to another wing fitting session.


Between this photo and the one above was a period of hours, and a number of on off sessions with the wing ensuring as Good fit as possible was made, Compared to earlier it now seems quite good.

Hope you find it worth looking at, Thanks for taking the time to look.